


Meal Prep Like a Pro: Cooking Basics
And we’re back! Last week we talked about how to plan ahead for meal prep and how it can save you precious time and effort preparing for your week. So you’ve done the planning and you’ve sat down made a game plan. Feeling more confident about this whole meal prep thing?
Then you walk into the kitchen with all the groceries. Do you get the feeling like the kitchen isn’t the room for you? That was 100% me! Just because food is my life doesn’t mean I’m this amazing chef. I mean I didn’t really cook (I loved to bake as a kid) until I was out of undergrad, so like 22 years old. So the kitchen was the place that held the microwave. No joke. But I knew becoming a better athlete and a better dietitian meant I had to get over my fear of the kitchen and just dive in. So I took additional cooking classes in grad school to learn and teach myself new skills and tips to help me conquer my fear of the kitchen. Today, I want to share some of those tips with you all because I can sit here and say “Go meal prep!” but if the barrier to doing that is getting into the kitchen, like it was for me, then I’m here to help encourage that confidence in you!
Cooking Basics
First, there are 9 essential pieces of equipment that will make cooking so much easier:
Skillet [can be iron cast]
Chef’s knife [Sharpened]
Cutting board [at least 2: one for veggies, one for meat]
Large Pot [for all that pasta and soups and stews]
Mixing spoon [for all that mixing and stirring]
Sheet tray [for those famous one pan meals :)]
Strainer [to wash all those vegetables]
Now you have the equipment, so let’s take that next step to success. Here are 3 skills to make you a master meal prep-er
1) Knife skills
Literally what I sucked at the most. I was scared of always cutting myself and I’m pretty sure my past self took about 3x longer to prep and cook just because of my knife skills alone. Improving your knife skills will guaranteed decrease your time in the kitchen by half! So here it is:
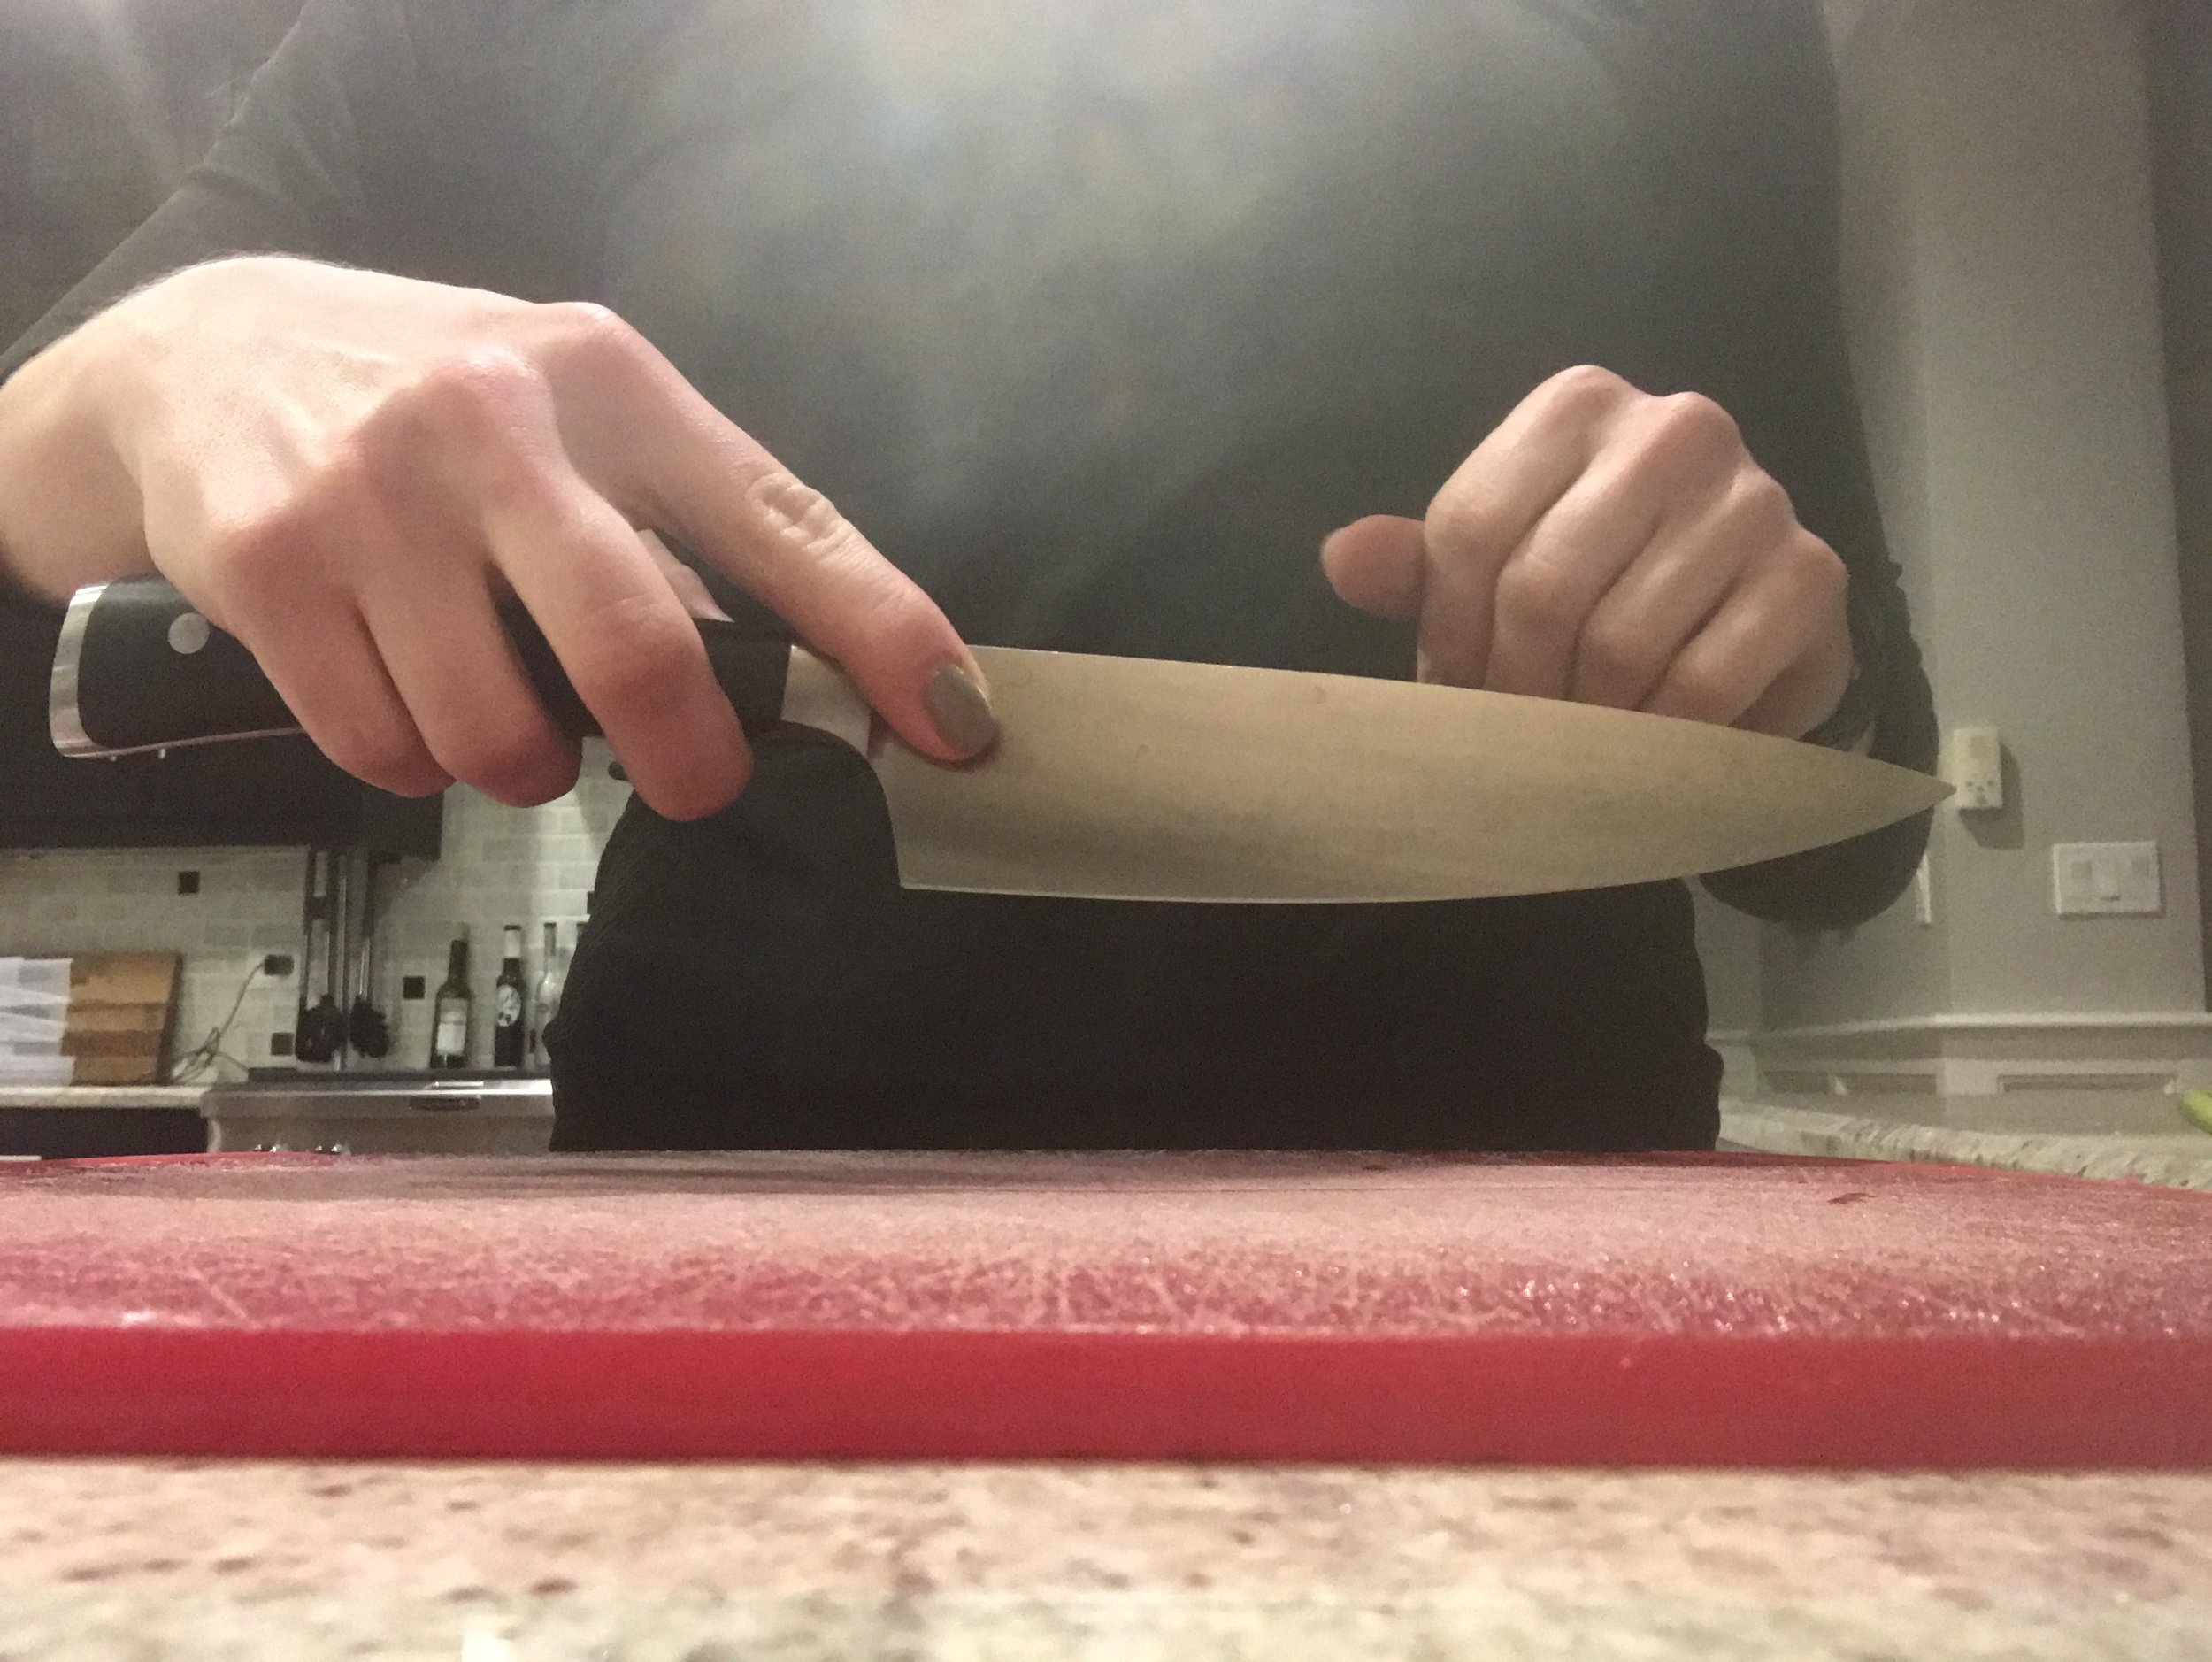
The knife grip & helping hand
How you hold the knife determines the wrist action and the ease of your cut. The palm of your hand goes around the handle, while the thumb and index finger grip the blade, as shown here.
The helping hand should look like a claw. Fingers bend up and your finger tips are holding the item you are cutting more than you hand.
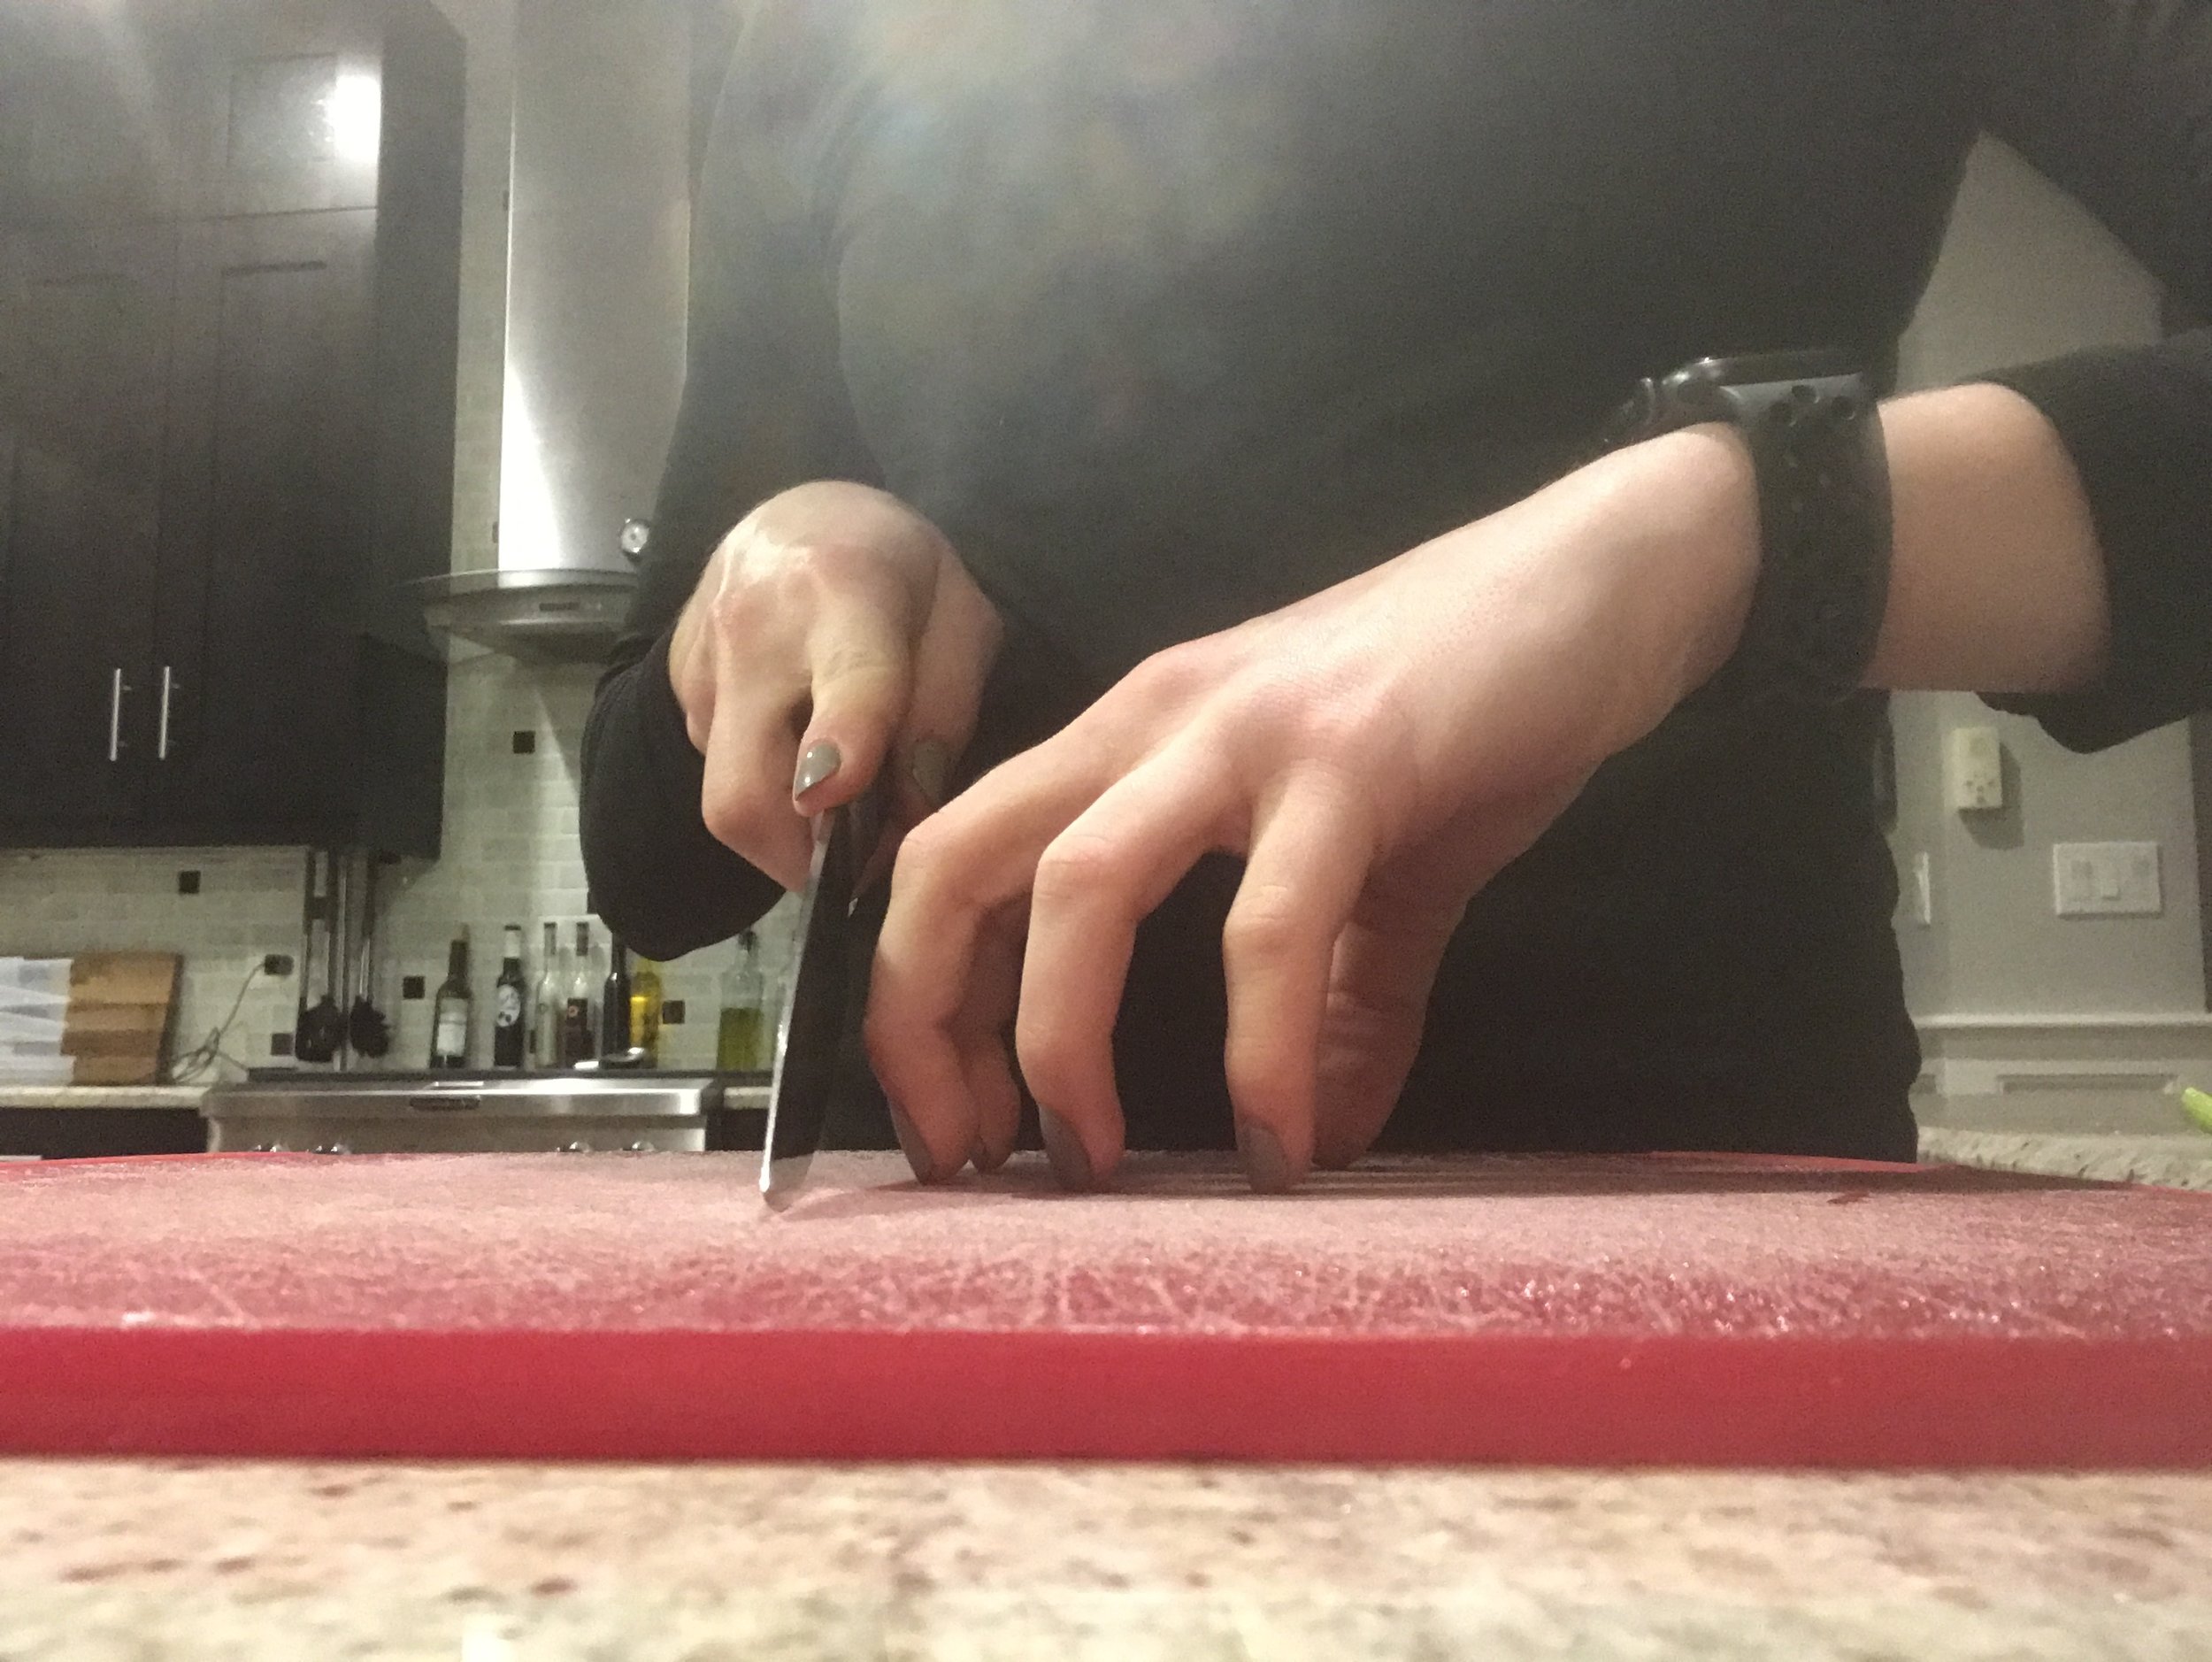
2. Rocking horse
You want to move the knife in a rocking motion away from you. Like you are threading a needle or stirring something. This allows for more efficiency and more even cuts. Why need more even cuts? For prettier Instagram photos? Not at all! The more even the cuts, the more even the cooking of the food.
[As there are many different cuts, please refer to this great article for more.]
2) Clean up made easy
Out of the cooking process, no one likes the clean up part. That’s why it’s never part of the directions on a recipe. Not really, but that’s what I like to tell myself :) But I have come up with these simple ways to make clean up easier
Invest in parchment paper
Best investment you can make. Since I’m a fan of roasting and the oven these days, parchment paper has saved me from lots of cleaning at the end of the process. All you have to do is lay it on the baking sheet and put your food on top. Once everything is done cooking, just remove the parchment paper and your cleaning is done!

2. Clean as you go
Since I used the stove top and oven more often now, I’ve learned that there are times where I don’t have the watch the water boil. So while my food cooks, I can take that time to wash cutting boards, knifes, and any bowls or measuring cups I used. Makes the clean up way easier once your delicious meal is done.
3) Whole grains with whole flavor
According to my boyfriend, I make the best quinoa. Now I can’t tell you why it’s the best or confirm it’s the best, but I will tell you, it’s pretty darn good. How do I do it? I’ll tell you.
Measure out the water
If there is too much water, then the grain will be mushier. Enter liquid measuring cups. The rule of thumb for grains like rice and quinoa is one part grain to two parts water or liquid. Be sure to adjust according to preference. Boil water with the grain, and simmer with a lid until grain absorbs water, about 15 minutes.
Add some flavor.
Quinoa and rice are great grains to cook with some flavor. You can add some spices that compliment your dish or you can find liquid like coconut water or orange juice to cook into the quinoa. For other liquids, I use a third full where if I need 1 cup of water, I do 1/3 cup of juice and 2/3 cup of water.
4) Cooking meat
Two of the most popular meat items that are prepared these days are fish and chicken. So, here’s how to optimally cook them, because not a single person likes under OR over cooked chicken and fish.
Chicken
For baking, make sure to preheat oven to 400 degrees and lay down that parchment paper on the baking sheet. Place the chicken on the baking sheet and cover with oil and spices, salt and pepper. Throw them in the oven for about 20-40 minutes. If you have a meat thermometer, the internal temperature should be 165 degrees Fahrenheit.
Fish
Baking fish can be easy and efficient in terms of time. Just preheat the oven to 425 degrees and line that baking sheet with parchment paper. Place the fish on the sheet, drizzle some olive oil on there and some spices, and then throw your chopped vegetables around the fish (One Pan meals for the win!). Cook for about 20 minutes, or until the fish is flaky with a fork.

These 4 tips will help make the kitchen a less scary place. And remember, like any skill, practice makes perfect. So practice with 1 recipe (no need to tackle 5 at once right out the gate) and find out your strongest cooking skills and continue to hone them. Find out your own tricks and share them!

